Hardware
Litex
NaxRiscv is ported on Litex :
Digilent nexys video
Once Litex is installed, you can generate and load the Digilent nexys video bitstream via for instance :
# RV64IMAFDCSU config, enough to run linux
python3 -m litex_boards.targets.digilent_nexys_video --cpu-type=naxriscv  --bus-standard axi-lite --with-video-framebuffer --with-spi-sdcard --with-ethernet --xlen=64 --scala-args='rvc=true,rvf=true,rvd=true' --build --load
Putting debian on the SDCARD
export SDCARD=/dev/???
(
echo o
echo n
echo p
echo 1
echo
echo +500M
echo y
echo n
echo p
echo 2
echo
echo +7G
echo y
echo t
echo 1
echo b
echo p
echo w
) | sudo fdisk $SDCARD

sudo mkdosfs ${SDCARD}1
sudo mkfs -t ext2 ${SDCARD}2
You need now to download part1 and part2 from https://drive.google.com/drive/folders/1OWY_NtJYWXd3oT8A3Zujef4eJwZFP_Yh?usp=sharing and extract them to ${SDCARD}1 and ${SDCARD}2
# Download images from https://drive.google.com/drive/folders/1OWY_NtJYWXd3oT8A3Zujef4eJwZFP_Yh?usp=sharing
mkdir mnt

sudo mount ${SDCARD}1 mnt
sudo tar -xf part1.tar.gz -C mnt
sudo umount mnt

sudo mount ${SDCARD}2 mnt
sudo tar -xf part2.tar.gz -C mnt
sudo umount mnt
Note that the DTB was generated for the digilent nexys video with : python3 -m litex_boards.targets.digilent_nexys_video –cpu-type=naxriscv –with-video-framebuffer –with-spi-sdcard –with-ethernet –xlen=64 –scala-args=’rvc=true,rvf=true,rvd=true’ –build –load
Then all should be good. You can login with user “root” password “root”. You can also connect via SSH to root.
The bottleneck of the system is by far accessing the spi-sdcard. (500 KB/s read speed), so, things take time the first time you run them. Then it is much faster (linux cached stuff). So, instead of –with-spi-sdcard, consider using –with-coherent-dma –with-sdcard with the driver patch described in https://github.com/SpinalHDL/NaxSoftware/tree/main/debian_litex, this will allow the SoC to reach 4MB/s on the sdcard.
The Debian chroot (part2) was generated by following https://wiki.debian.org/RISC-V#Creating_a_riscv64_chroot and https://github.com/tongchen126/Boot-Debian-On-Litex-Rocket/blob/main/README.md#step3-build-debian-rootfs. Also, it was generated inside QEMU, using https://github.com/esmil/riscv-linux “make sid”
You can also find the dts and linux .config on the google drive link. The .config came mostly from https://github.com/esmil/riscv-linux#kernel with a few additions, especialy, adding the litex drivers. The kernel was https://github.com/litex-hub/linux commit 53b46d10f9a438a29c061cac05fb250568d1d21b.
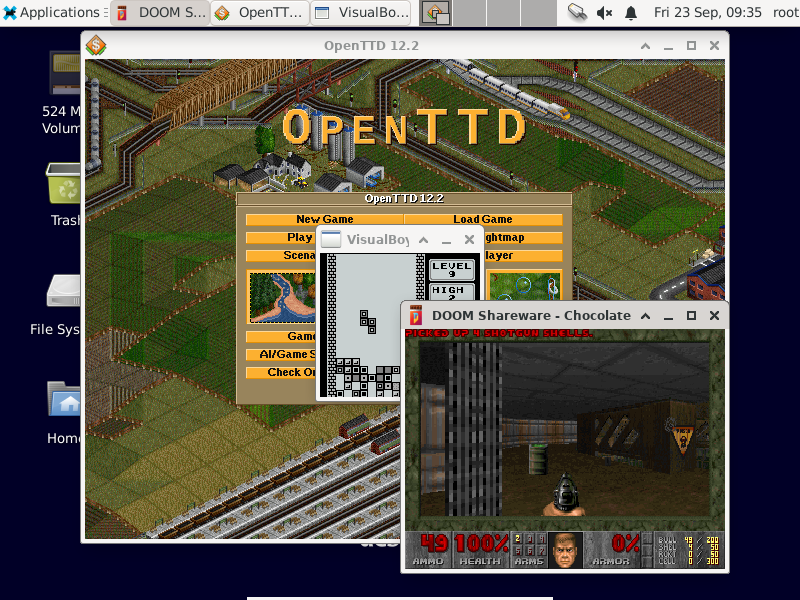
Adding packages, like xfce-desktop, chocolate-doom, openttd, visualboyadvance you can get things as following :

Generating everything from scratch
You can find some documentation about how to generate :
Debian rootfs
Linux kernel
OpenSBI
here : https://github.com/SpinalHDL/NaxSoftware/tree/main/debian_litex
It also contains some tips / tricks for the none Debian / Linux experts.
ASIC
While mainly focused on FPGA, NaxRiscv also integrate some ASIC friendly implementations :
Latch based register file
Automatic generation of the openram scripts
Automatic blackboxing of the memory blocks (via SpinalHDL)
Parametrable reset strategy (via SpinalHDL)
An optimized multiplier
Generating verilog
You can generate an example of ASIC tunned NaxRiscv using :
cd $NAXRISCV
sbt "runMain naxriscv.platform.asic.NaxAsicGen"

ls nax.v
If you want to target sky130, with openram memories, you can do :
cd $NAXRISCV
sbt "runMain naxriscv.platform.asic.NaxAsicGen --sky130-ram --no-lsu" # ()no-lsu is optiona)

ls nax.v sram/*
In order to artificialy reduce the register file, you can use the --regfile-fake-ratio=X argument, where X need to be a power of two, and will reduce the register file size by that ratio.
You can also generate a design without load/store unit by having the --no-lsu argument.
If you use NaxRiscv as a toplevel, You can generate the netlist with flip flop on the IO via the --io-ff argument in order to relax timings.
You can ask SpinalHDL to blackbox memories with combinatorial read using the --bb-comb-ram argument. This will also generate a comb_ram.log file which contains the list of all the blackbox used. The layout of the blacbox is :
ram_${number of read ports}ar_${number of write ports}w_${words}x${width} ${name of replaced ram} (
  .clk           (clk                             ), //i

  .writes_0_en   (...                             ), //i
  .writes_0_addr (...                             ), //i
  .writes_0_data (...                             ), //i
  .writes_._en   (...                             ), //i
  .writes_._addr (...                             ), //i
  .writes_._data (...                             ), //i

  .reads_0_addr  (...                             ), //i
  .reads_0_data  (...                             ), //o
  .reads_._addr  (...                             ), //i
  .reads_._data  (...                             ), //o
);
You can customize how the blackboxing is done by modifying https://github.com/SpinalHDL/NaxRiscv/blob/488c3397880b4c215022aa42f533574fe4dd366a/src/main/scala/naxriscv/compatibility/MultiportRam.scala#L488
Also, if you use --bb-comb-ram, you may also consider using --no-rf-latch-ram which will also enable the generation of the register file blackbox.
OpenRam
You can use OpenRam to generate the ram macros generated by the --sky130-ram argument.
Here is a few dependencies to install first :
git clone https://github.com/VLSIDA/OpenRAM.git
cd OpenRam

./install_conda.sh
make pdk # The first time only
make install  The first time only
pip install -r requirements.txt

mv technology/sky130/tech/tech.py technology/sky130/tech/tech.py_old
sed '/Leakage power of 3-input nand in nW/a spice["nand4_leakage"] = 1' technology/sky130/tech/tech.py_old > technology/sky130/tech/tech.py


cd macros
cp -rf $NAXRISCV/sram/sky* sram_configs
cp -rf $NAXRISCV/sram/openram.sh . && chmod +x openram.sh

# Run the macro generationThis will take quite some time
./openram.sh

ls sky130_sram_1r1w_*
OpenLane
You can use openlane to generate a GDS of NaxRiscv.
Setup / how to reproduce
You can get the openlane docker via :
Then :
# Generate a NaxRiscv verilog (here without using the ram macro)
(cd $NAXRISCV && sbt "runMain naxriscv.platform.asic.NaxAsicGen")

git clone https://github.com/The-OpenROAD-Project/OpenLane.git
cd OpenLane
make mount
make pdk # the first time only

# Setup the design
cp -rf $NAXRISCV/src/main/openlane/nax designs/nax
mkdir designs/nax/src
cp -rf $NAXRISCV/nax.v designs/nax/src/nax.v

# You will find your design in  designs/nax/runs/$TAG
export TAG=run_1

# This will run all the openlane flow, and will take hours
./flow.tcl -design nax -overwrite -tag $TAG

# Run the openroad GUI to visualise the design
python3 gui.py --viewer openroad ./designs/nax/runs/$TAG
If you want to reproduce with the ram macros, then :
Generate the NaxRiscv verilog file with the --sky130-ram argument.
update the designs/nax/src/nax.v
Generate the ram macro using openram
Uncomment the ram macro related things in the OpenLane/designs/nax/config.tcl file and copy the macros files there.
cd $NAXRISCV
sbt "runMain naxriscv.platform.asic.NaxAsicGen --sky130-ram"
cp -rf $NAXRISCV/nax.v $OPENLANE/designs/nax/src/nax.v

# Do the things described in the OpenRam chapter of this doc to generate the ram macros

mkdir $OPENLANE/designs/nax/sram
cp $OPENRAM/macros/sky130_sram_1r1w_*/sky130_sram_1r1w_*.* $OPENLANE/designs/nax/sram
sed -i '1 i\/// sta-blackbox' $OPENLANE/designs/nax/sram/*.v
sed -i 's/max_transition       : 0.04/max_transition       : 0.75/g' $OPENLANE/designs/nax/sram/*.lib

# Run flow.tcl
Running simulation
You can run a simulation which use the NaxRiscv ASIC specific feature inside a little SoC by running :
sbt "runMain naxriscv.platform.tilelinkdemo.SocSim --load-elf ext/NaxSoftware/baremetal/dhrystone/build/rv32ima/dhrystone.elf --no-rvls --iverilog --asic"
By using iverilog instead of verilator, its ensure that the Latch based register file is functional.
Results
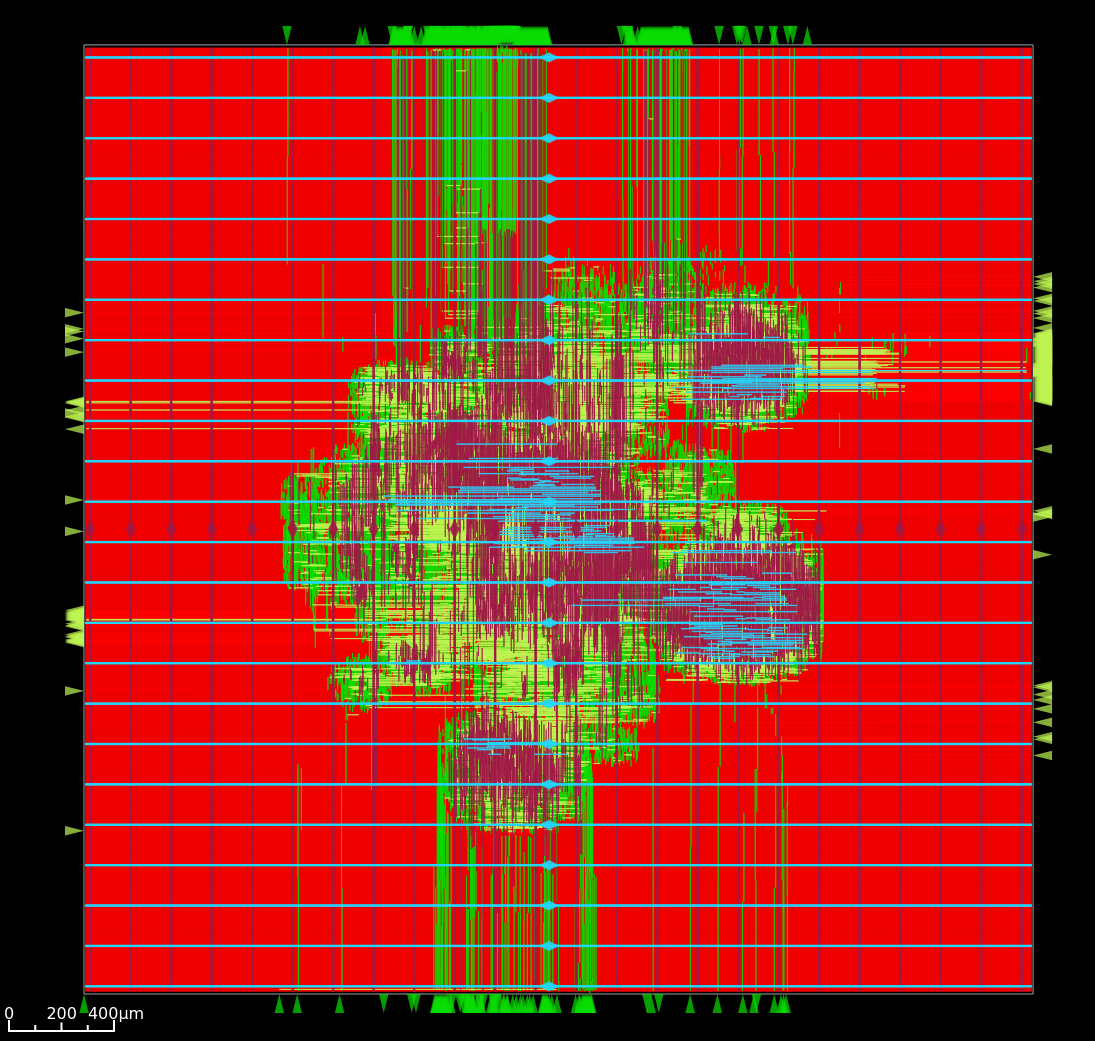
Here is the result of openlane with the default sky130 PDK and NaxRiscv as toplevel (–regfile-fake-ratio=8 –io-ff), so, without any memory blackbox and with a reduced I$ / D$ / branch predictor size as follow :
case p: FetchCachePlugin => p.wayCount = 1; p.cacheSize = 256; p.memDataWidth = 64
case p: DataCachePlugin => p.wayCount = 1; p.cacheSize = 256; p.memDataWidth = 64
case p: BtbPlugin => p.entries = 8
case p: GSharePlugin => p.memBytes = 32
case p: Lsu2Plugin => p.hitPedictionEntries = 64

The maximal frequency is around ~100 Mhz, with most of the critical path time budget being spent into a high fanout net (see issues section). The total area used by the design cells being 1.633 mm². The density was set with FP_CORE_UTIL=40 and PL_TARGET_DENSITY=45.
The main obstacle to frequancy and density being described bellow in the Issue section.
Issues
There is mostly two main issues :
Sky130 + openroad has “sever” density/congestion issues with the register file (4R2W/latch/tristate). One workaround would be https://github.com/AUCOHL/DFFRAM, but unfortunately, it doesn’t support configs behond 2R1W (issue https://github.com/AUCOHL/DFFRAM/issues/192).
There is also a macro insertion halo issue which makes the usage of openram macros impossible at the moment, where the power lines get too close to the macro, not giving enough room for the data pins to route. See https://github.com/The-OpenROAD-Project/OpenLane/issues/2030
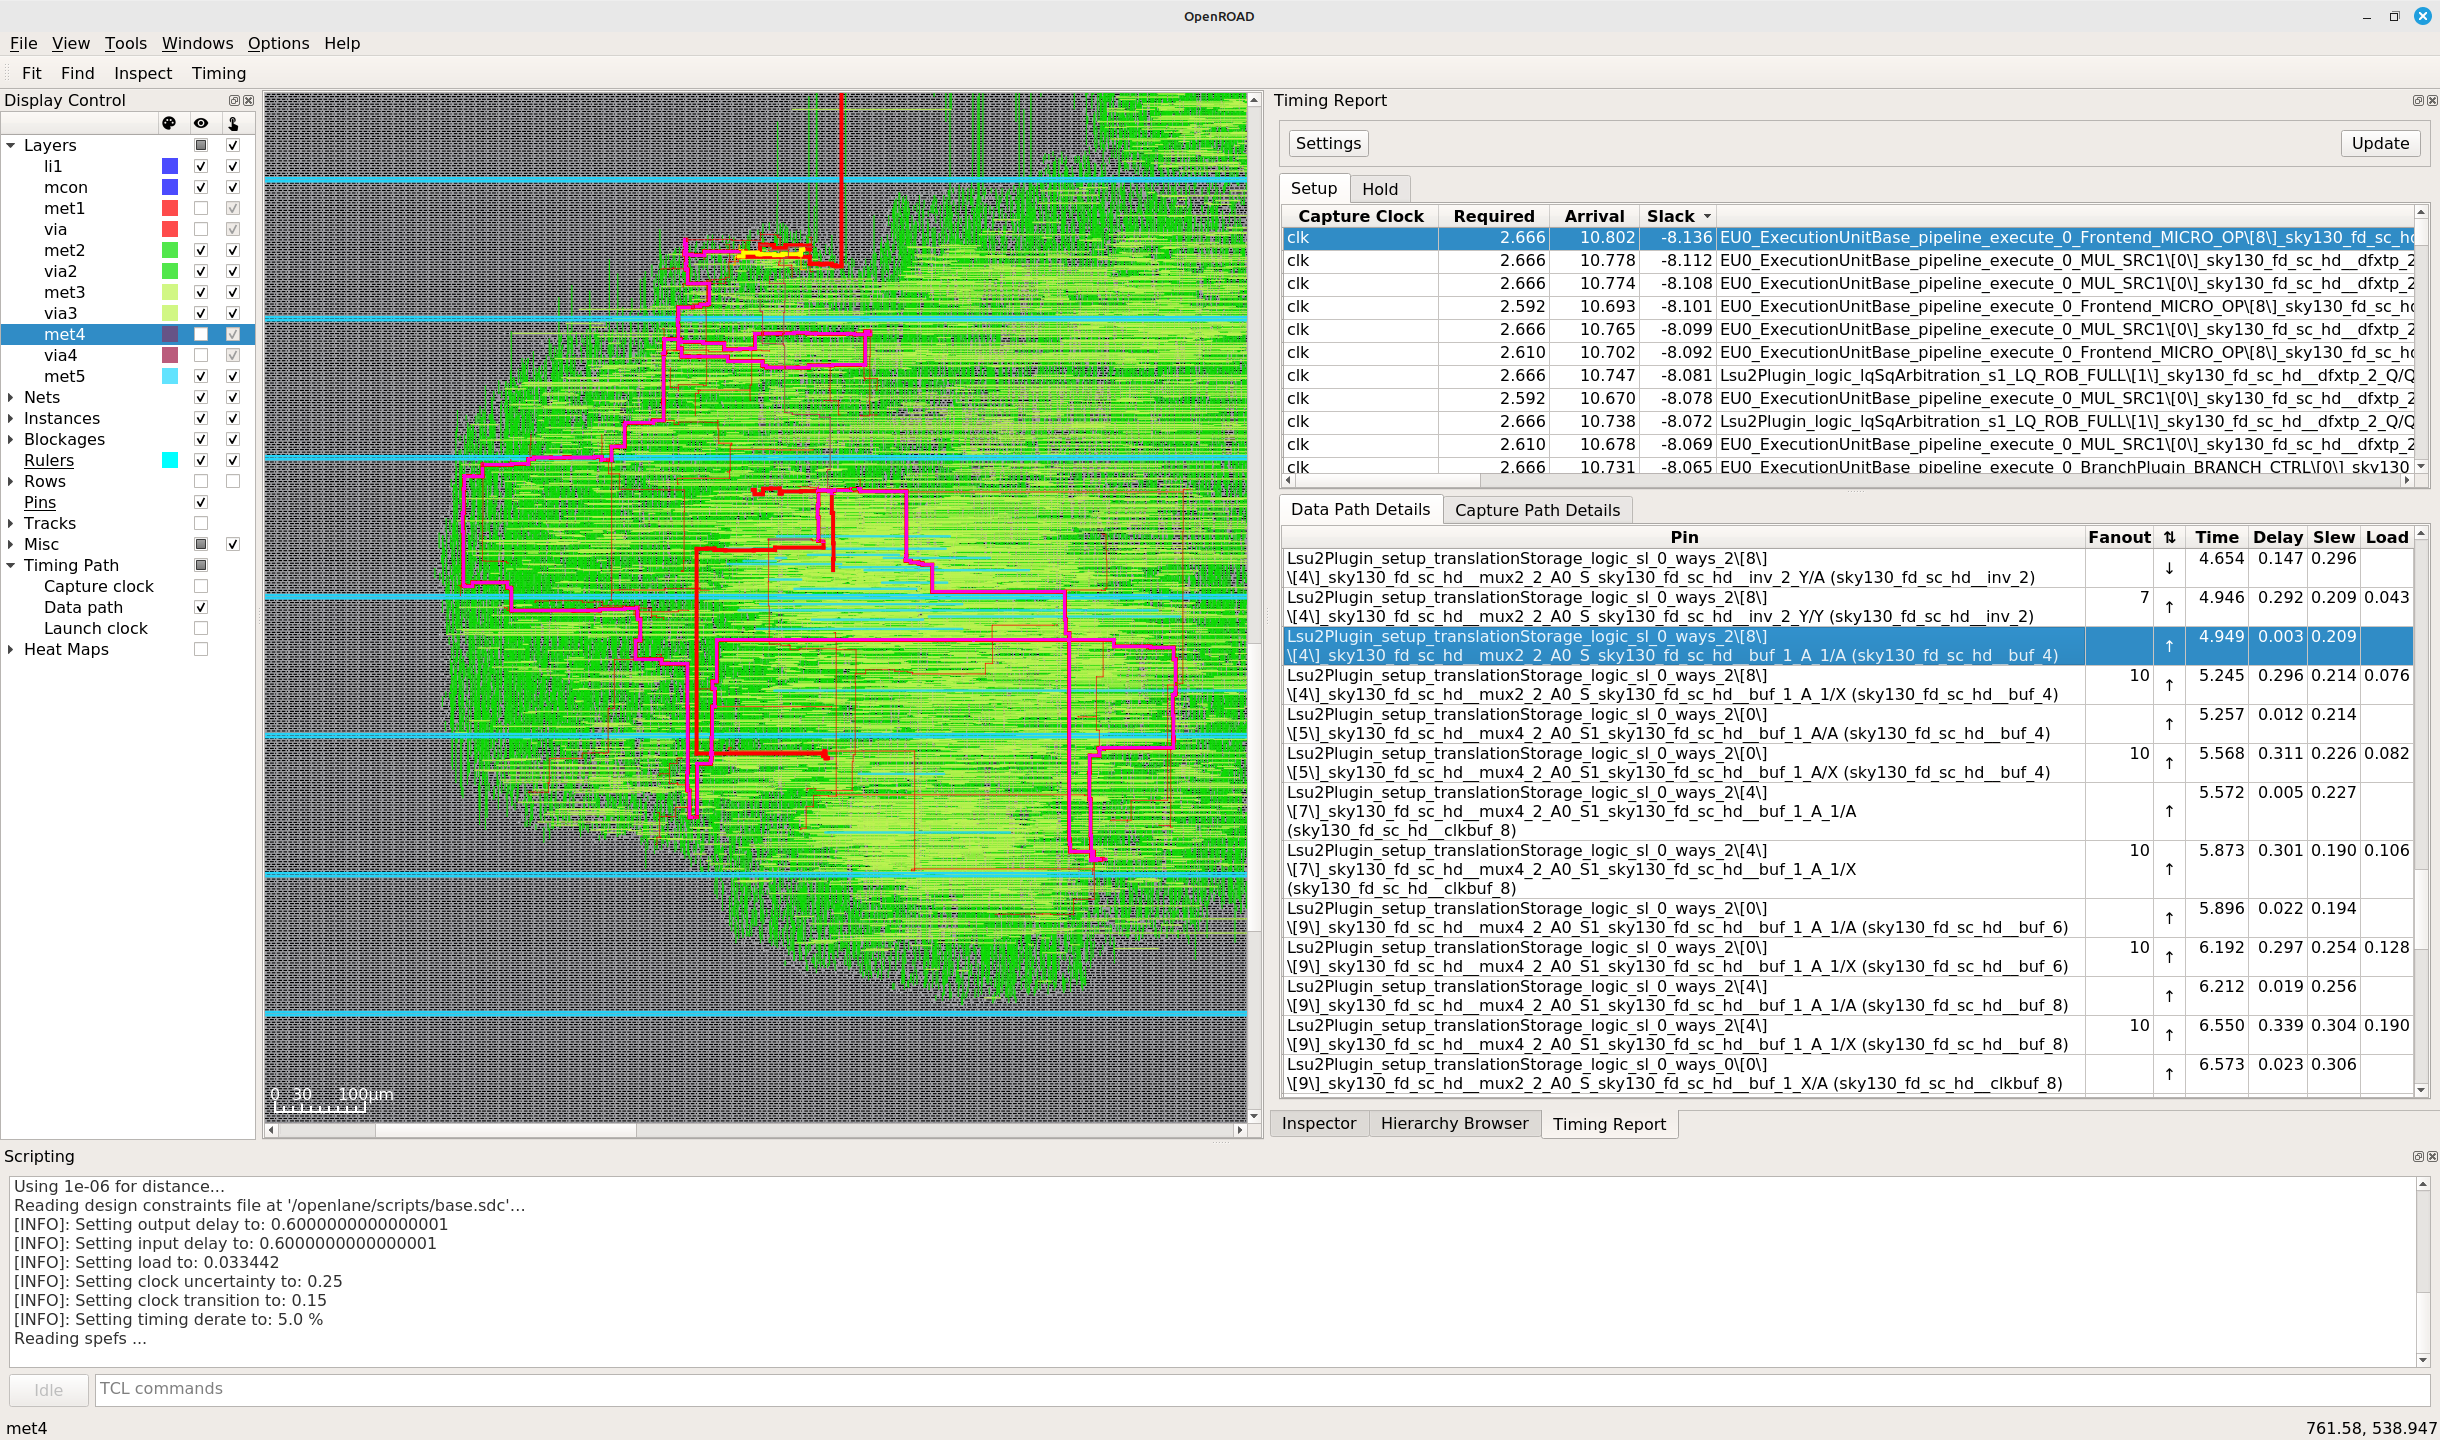
Otherwise, the main performance issue observed seems to be the unbalenced insertion of buffer on high fanout logics. One instance happend for the MMU TLB lookup. I had the TLB setup as 6 ways of 32 entries each (a lot), meaning the virtual address was used to gatter information from 7360 TLB bits (2530 muxes to drive). In this scenario, the ASIC critical path was this TLB lookup, where most of the timing budget was spent on distributing the virtual address signal to those muxes. The main issue being it was done through 13 layers of various buffer gates with a typical fanout of 10, while a utopian balanced fanout would be able to reach 10^13 gates, while here it is only to drive 2530 muxes. See https://github.com/The-OpenROAD-Project/OpenLane/issues/2090 for more info. This issue may play an important role into the congestion / density / frequency performances.
Here you can see in pink the buffer chain path.
